Is your WordPress site secure? You might think so, but are you prepared for the unexpected?
The whitehat researchers at Patchstack found that most WordPress vulnerabilities arise not from the core platform but from overlooked weaknesses and easily preventable mistakes.
While the WordPress Core is secure, plugins, themes, and user practices can introduce vulnerabilities. Securing your WordPress website isn't a one-time fix; it's an ongoing process.
In this guide, we will provide actionable steps to harden your site. We will cover various security tips ranging from basic precautions to advanced techniques. This will address the obvious threats and the subtle vulnerabilities often overlooked.
By the end of this article, you will have a better understanding of website security and be able to protect your site from the vast majority of cyber attacks.
Let’s get started!
WordPress Core & Plugin Security Checklist
1 – Keep your WordPress installations up to date
We have said it repeatedly: updating your plugins and themes regularly is the easiest way to protect your website from potential vulnerabilities. However, some people hesitate to update their sites regularly as the latest changes occasionally break existing functionality and could cause downtime.
Waiting to update your WordPress site might seem like a safe bet, but recovering from a hack costs significantly more than fixing update-related downtime. If a website is hacked, it doesn't just mean temporary unavailability – it brings potential data breaches, regulatory fines, damaged reputation, lost customer trust, and the expensive process of cleaning malware and rebuilding compromised systems.
Even a few hours of planned downtime for updates pales compared to the weeks or months of recovery after a security breach.
Your website update approach should match your resources and needs. For businesses with limited budgets, always start with a backup before any update. If your hosting provider offers staging environments, use them to test updates before applying them to your live site. For larger organizations, we recommend maintaining a complete staging environment that mirrors your production site for thorough testing.
Finally, the Cyber Resilience Act (CRA) introduced some changes to WordPress security management in late 2024. This regulation mandates releasing security and feature updates separately. This means you can now track the changelogs of websites and use that information to:
- Prioritize critical security patches
- Apply security fixes without waiting for feature update
- Make informed decisions about update timing
- Reduce the risk of update-related conflicts
2 – Install a WordPress security plugin
Think of protecting your website security as like protecting your home. You don't rely solely on a door lock – you also need an alarm system, security cameras, and proper lighting. Similarly, just installing an SSL certificate on your website is not enough. You must also track your software vulnerabilities, block unauthorized access attempts, and monitor access logs regularly.
We recently published a detailed blog post evaluating the best WordPress security plugins, but if you are in a hurry, we recommend just using Patchstack.
Patchstack is your complete WordPress security system, and it goes far beyond traditional security plugins that scan for malware. Instead of waiting for attacks, Patchstack actively identifies vulnerabilities in your themes, plugins, and core WordPress files, then applies virtual patches to protect your site even before official fixes become available.
Virtual patching stops attackers from exploiting known vulnerabilities without changing any website code, giving you the protection that traditional security plugins simply can't match.
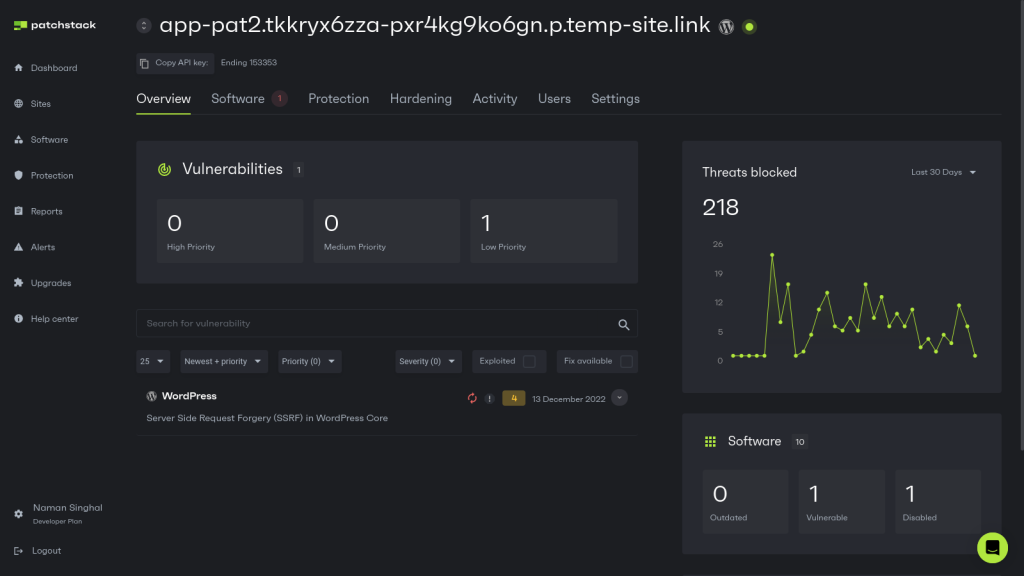
While installing Patchstack significantly strengthens your WordPress security, remember that it's part of a larger security strategy – not a magic bullet.
You still need strong passwords, regular backups, careful user management, and proper server security practices, as outlined in the rest of this guide.
3 – Take action on Patchstack vulnerability notifications
In our previous post, we explained how poorly written code can result in vulnerabilities and put WordPress sites at risk of hacking. If you use a vulnerability monitoring service, you will receive timely vulnerability notifications, but just monitoring the vulnerabilities is not enough; swift action on those notifications is equally essential.
Patchstack's vulnerability alerts provide critical information about security flaws in plugins installed on your website. You should prioritize addressing these vulnerabilities promptly to minimize the window of opportunity for attackers.
We’re all familiar with ‘alert fatigue’, which can easily result in overlooking or ignoring critical issues that need urgent attention. At Patchstack, we completely understand this issue, which is why we developed the Patchstack Priority Score system.
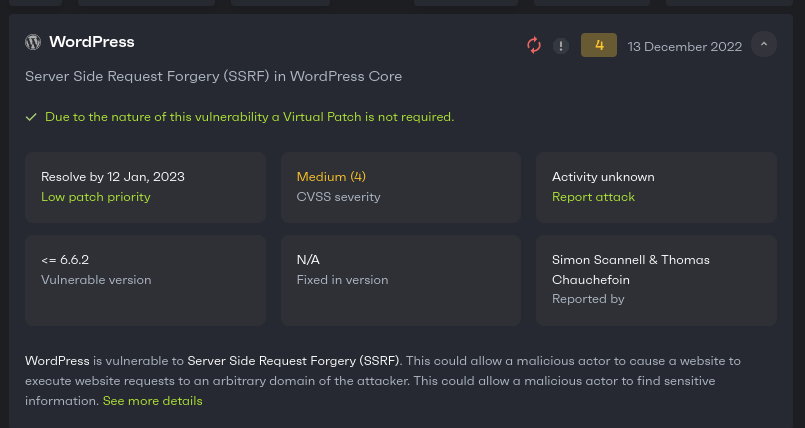
You can use the Patchstack Priority Score (High, Medium, Low) to assess the urgency of each vulnerability and prioritize patching accordingly. High-priority vulnerabilities demand immediate attention, while medium and low-priority issues should be addressed as soon as reasonably possible.
For example, the following vulnerability notification requires your attention:
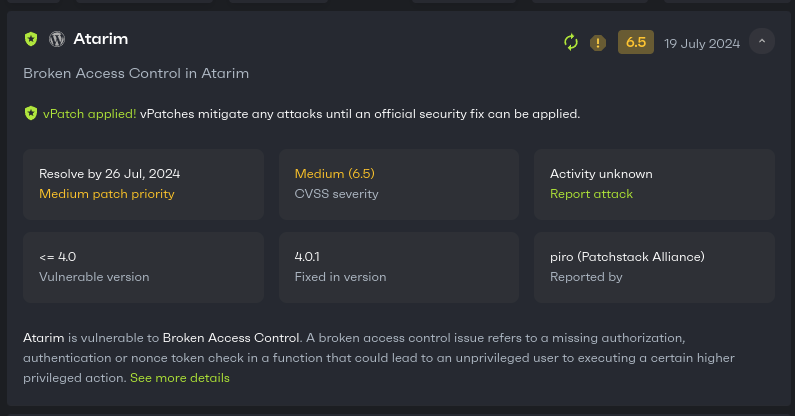
In contrast to the above image, the following notification is not urgent, and you can wait a couple of days to update your system:
4 – Use a WordPress activity log plugin to track user activity
Website owners need to track every action on their WordPress site to stay on top of things, and this can be done easily using a WordPress Activity log plugin. You can think of WordPress activity log tracking as your digital security camera, which records who does what and when they do it.
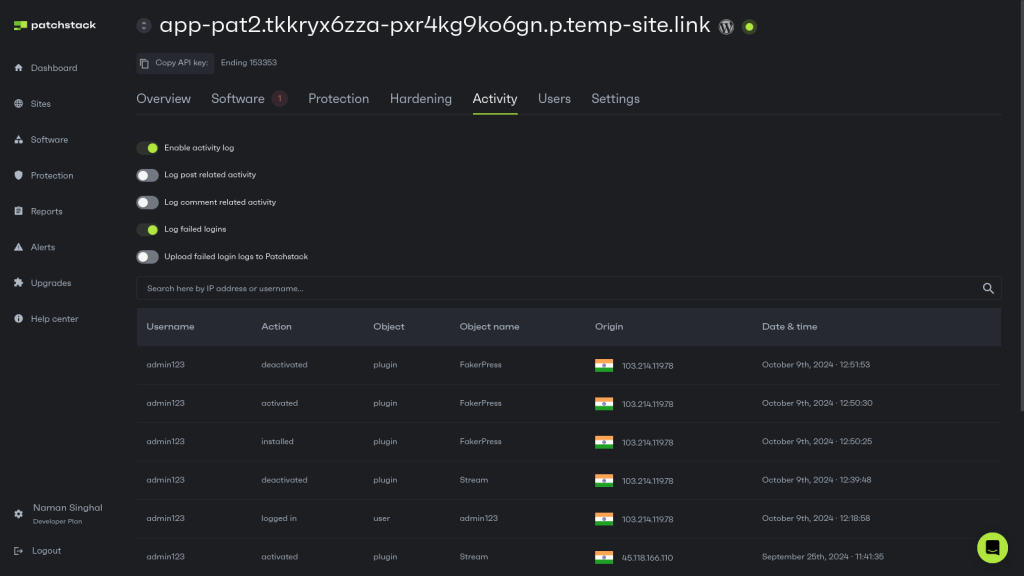
Patchstack’s activity log offers a detailed view of user actions, such as plugin installations and login attempts, to help you understand exactly what changes were made and by whom. While it won’t prevent unauthorized actions in real time, this audit feature allows administrators to backtrack and identify potentially harmful actions that may have already occurred. This visibility can be crucial for minimizing damage, as it lets you pinpoint the source of a problem quickly and take corrective action.
Activity logging isn't just about security; it's also necessary to avoid regulatory fines and compliance issues. This comprehensive monitoring helps demonstrate to regulators that you're actively protecting user data and maintaining site security. This can be crucial in demonstrating ‘due care’ should you face potential action due to a breach of GDPR, CRA, or other regulation infringement.
For example, if someone claims their data was mishandled, you can quickly trace exactly who accessed or modified that data and when it happened.
By tracking actions such as plugin installations, theme changes, user role modifications, and content updates, you maintain control over your site, while building a reliable record of all administrative actions. Refer to our post on the best WordPress actively log plugins to learn which tool is best for you.
5 – Remove inactive WordPress themes and plugins
In our Patchstack weekly episode, we discussed how using nulled plugins and themes can infect your WordPress website with malware. But even if you only use plugins from trusted sources, they can still contain inherent vulnerabilities.
If you have many unused plugins and themes, they can be a potential entry point for attackers. Every installed plugin or theme, whether active or inactive, contains code that can be exploited.
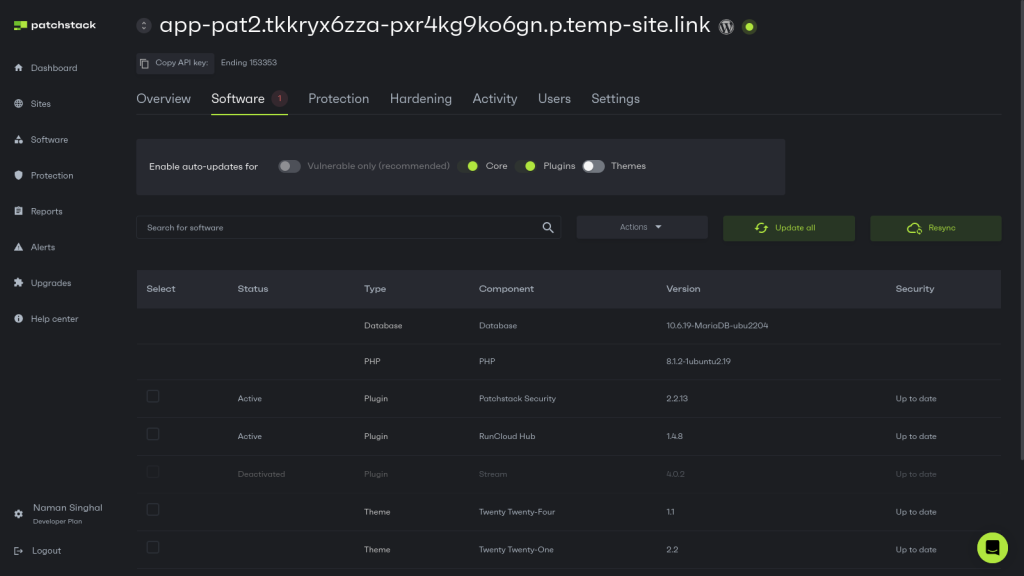
The "inactive" status only means WordPress isn't currently running the code, but the files remain on your server and are still accessible to attackers.
When you deactivate a plugin or theme, immediately ask yourself: "Will I need this again in the next week?" If the answer is no, delete it right away. If yes, set a calendar reminder to review and remove it after your temporary need ends.
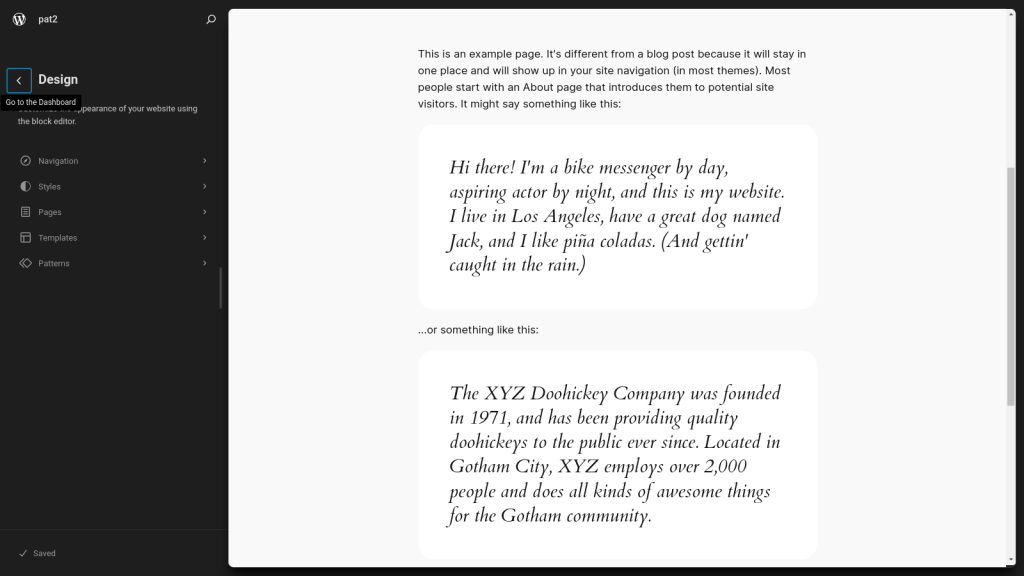
However, we recommend keeping one official WordPress theme (such as Twenty Twenty-Four) as a backup - WordPress has a built-in failsafe that activates this default theme if your current theme encounters critical errors, preventing your site from displaying the dreaded 500 error page.
6 – Vet all new plugins, themes, and 3rd party software you connect to your WordPress site
After removing the inactive plugins, the logical next step is to audit and inspect all the remaining plugins and themes. We recommend thoroughly vetting all plugins, themes, and third-party software before integrating them into your WordPress site, as every piece of code on your server is a potential vulnerability, and attackers don't care whether WordPress considers that code "active" or not.
Before activating your live site, you can conduct security audits of new plugins and themes. We recommend using a staging environment to test new additions and observe their behavior to see if they break anything. As mentioned later in the PoLP section, you should inspect the permissions requested by the plugin or theme and ensure they align with its functionality, as excessive or unnecessary permissions can be a potential security risk.
However, when auditing the tools, relying solely on popularity or positive reviews is insufficient. You should research the developer's reputation, scrutinize user reviews for security concerns, and examine the plugin or theme's code for potential vulnerabilities. This due diligence minimizes the risk of introducing vulnerabilities. But if you don’t have time, refer to WordPress plugin recommendation guides written by Patchstack experts.
7 – Disable file editing from the admin dashboard
Your WordPress dashboard has a built-in code editor, which is handy for quick fixes. But if an attacker gains admin access, this same tool can be used against you to inject malicious code directly into your site's files.
Disabling this editor is a quick and easy win that adds an extra layer of security. You can disable your theme editor by adding this single line to your wp-config.php file:
define('DISALLOW_FILE_EDIT', true);While a truly determined attacker might find other ways to modify files, removing the most readily available tool forces them to take extra steps, like installing a new plugin or accessing your server directly, which increases the chances of their activity being detected.
8 – Disable PHP file execution
If your site allows users to upload files as attachments, this is one of the most important things you should do. Attackers often target upload directories such as "wp-content/uploads" to inject malicious PHP scripts. By disabling execution, you effectively neutralize these attempts, even if a malicious file bypasses other security measures and resides on the server.
One way to achieve this is by configuring your web server to prevent script execution in the uploads directory. For example, if your server uses Apache, you can modify your .htaccess file to block the execution of PHP files. This is done by adding rules instructing the server to reject attempts to run files with the .php extension.
However, server configurations vary. Nginx, LiteSpeed, and other web servers handle this differently. Consult your web server's documentation or hosting provider for the appropriate method for your specific environment. If you don’t want to manually edit the server config, consider using security plugins that offer automated solutions to protect your upload directory. Regardless of your chosen method, preventing script execution in upload directories adds a crucial layer of defense to your WordPress site.
For step-by-step instructions, refer to our previous post explaining how to disable PHP file execution for WordPress websites.
9 – Disable WP_debug and other error logs in production
The WP_DEBUG setting is an invaluable tool during development but poses a significant security risk in production environments. Enabling this setting reveals detailed error messages to all visitors, which can potentially expose sensitive information about your website's configuration, database credentials, and file paths to malicious actors.
Attackers can exploit this information to identify vulnerabilities and launch targeted attacks. Therefore, you must explicitly disable WP_DEBUG in production by setting its value to false in the wp-config.php file.
Similarly, publicly accessible error logs can be disastrous and lead to potential exploits. While comprehensive logging is crucial for troubleshooting and monitoring, these logs should remain inaccessible to external users. Developers should configure their servers to store logs securely and restrict access to authorized personnel only.
10 – Disable directory browsing
If you enable directory browsing on your server, visitors can view the contents of a directory on your web server if no index file (like index.html or index.php) exists.
Directory browsing is a security risk because it can expose file and folder structures, revealing potentially sensitive information about your website's architecture. Attackers can use this information to identify vulnerabilities or target specific files for malicious purposes.
You can verify if directory browsing is disabled by attempting to access a directory on your website that doesn't contain an index file. Browsing is enabled if you see a list of files within that directory. If you see a "403 Forbidden" or a similar error message, it is likely disabled.
Disabling directory browsing is usually achieved through server configuration. Read our previous post, which explains how to disable directory browsing to obscure your website's internal structure from prying eyes.
11 – Disable PHP file execution in sensitive directories (and a word on file permissions)
A crucial aspect of WordPress security is limiting where PHP code can be executed. Attackers often try to upload malicious PHP files into vulnerable directories, hoping to gain control of your site. By disabling PHP execution in directories where it's not strictly necessary, you significantly reduce the impact of successful uploads.
You should limit PHP execution in directories such as /uploads/, /wp-includes/, and /wp-admin/. Within an .htaccess file in these directories, adding the following lines can effectively prevent PHP execution:
<Files *.php>

  Order Deny,Allow

  Deny from all

</Files>
This tells the server to refuse any attempt to run a PHP file within those directories. While this isn't a foolproof solution (determined attackers can sometimes bypass these restrictions), it adds another layer of defense and makes exploitation significantly more difficult.
Login & User Security Checklist
12 – Ensure that admins (or any privileged user) use a secure password
It might sound obvious, but strong passwords are your website's first line of defense. Most security breaches happen because people reuse passwords across different sites. When hackers breach one site, they try these stolen passwords everywhere else – that's called credential stuffing.
To protect your WordPress site, you should always generate unique, complex passwords using a password manager and check any existing passwords against the HaveIBeenPwned database to ensure they haven't been compromised.
If you suspect your password has been compromised, refer to our other post to learn how to change or reset your WordPress passwords and then force existing users to log out of WordPress.
You should never use common passwords like "password123" or personal information like birthdays. Hackers have an extensive database of these weak passwords, which can be cracked within seconds. A strong password should combine random letters, numbers, and symbols; your password should look more like "kJ9#mP2$vL" than "pizza123".
If you want to go further, consider changing your WordPress login URL for additional protection.
13 – Take advantage of two-factor authentication
Even if a user has the longest password with all the special characters, it can still be hacked if they’re careless. Therefore, you should implement Two-Factor Authentication (2FA) on your websites to protect them from phishing attacks.
If you're managing a team, enforce 2FA for all admin accounts without exception, and consider requiring it for all user accounts with edit permissions. Upgrade to FIDO2-compatible security keys or passkeys, which are virtually impossible to phish or steal, unlike traditional SMS codes or authenticator apps.
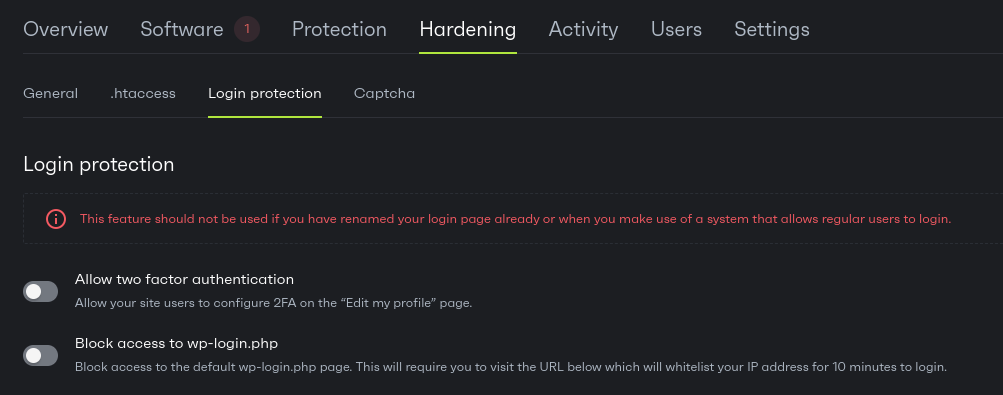
Passkeys are particularly powerful because they eliminate password headaches while providing stronger security. They're tied to your device's biometric security (like fingerprint or face recognition) and can't be copied or reused across different sites.
We have previously written a guide to help you enable 2FA on WordPress websites that you can refer to learn how to do it securely.
14 – Remove any users that use basic usernames (i.e. “admin” or “administrator”)
Using default or easily guessed admin usernames like "admin," "administrator," or even "webmaster" is a huge security risk. These common usernames are the first targets in a brute-force attack, a sort of automated guessing game attackers use.
Therefore, removing that account or changing its username to something unique is best. When creating new admin accounts, you can combine your initials with random numbers, the current year, or anything else that makes it harder to guess. Something like "sitemanager_2024" is much more secure than simply "admin".
Finally, before you delete the old, insecure admin account, transfer any content ownership to the new, secure account. This ensures a smooth transition and keeps your content safe and sound.
Server & Network Security Checklist
15 – Protect your site with a Web Application Firewall (WAF)
A Web Application Firewall (WAF) is software or hardware that inspects your website's incoming and outgoing traffic. Let’s understand this with the help of an example: if your website was a building, then you can think of WAF as a security guard that checks the IDs of all the visitors who enter and leave.
External WAFs, like Cloudflare or FortiGate, can filter out bad traffic before reaching your server. They can inspect the traffic at the network level, inspect every connection, and block known attack patterns without using your site's resources. However, since these services protect millions of websites simultaneously, they apply broader protection rules that might not catch site-specific threats.
Internal WAFs use a minuscule amount of your server's resources (CPU, memory, and bandwidth) and provide more precise protection tailored to your specific WordPress setup.
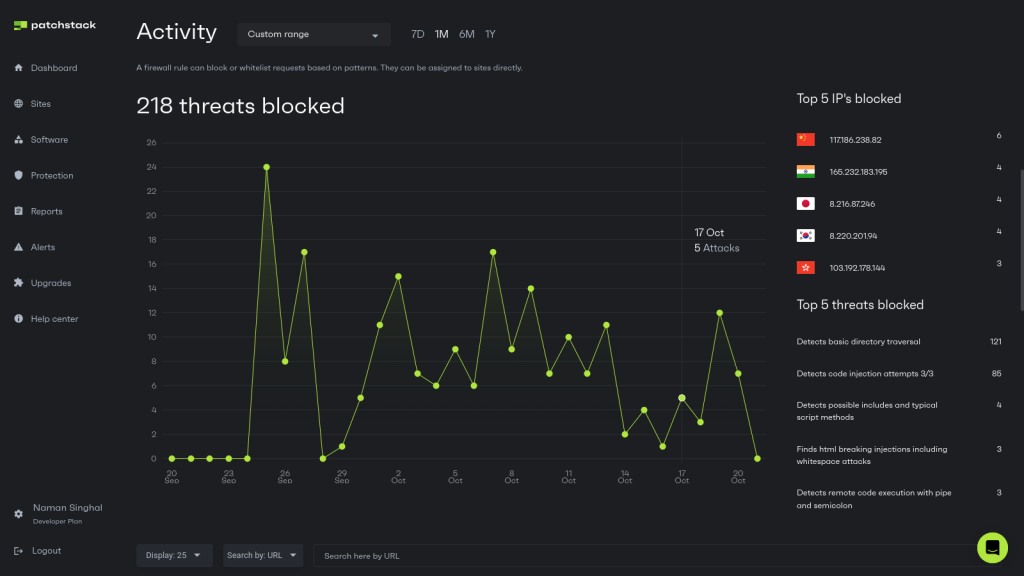
This dual-layer approach of using both external and internal WAFs gives you comprehensive protection as the external WAF blocks large-scale attacks and malicious traffic patterns. In contrast, the internal WAF provides targeted protection against WordPress-specific threats and zero-day vulnerabilities.
16 – Implement security headers
Security headers are one of the most powerful ways to enhance your website's security without installing additional plugins or firewalls. Security headers instruct browsers on how to handle your site's content, and properly implementing these headers can mitigate a wide range of attacks, including cross-site scripting (XSS), clickjacking, and MIME sniffing.
- For instance, CSP allows you to define trusted sources for scripts, stylesheets, and other resources, which can effectively prevent the execution of malicious code injected via XSS attacks.
- HSTS forces browsers to communicate with your site over HTTPS, protecting against downgrade attacks and ensuring encrypted communication.
While configuring these headers can seem technically complex, numerous online resources and tools provide guidance and simplify the implementation process. Read our article: A Detailed Guide To Add WordPress Security Headers
17 – Avoid using FTP for file transfer; use SFTP instead
FTP is a common method to transfer files, but it is an old standard that transmits data in plain text. This means it can expose your login credentials and website files to a potential hacker who intercepts your traffic. This vulnerability makes FTP a prime target for attackers seeking unauthorized access to your server.
SFTP (Secure File Transfer Protocol), on the other hand, encrypts all data transferred between your computer and the server, safeguarding your credentials and website files from eavesdropping and tampering. Switching to SFTP is a simple yet effective step in significantly improving your website's security.
Additionally, tools such as rsync offer further enhancements for secure and efficient file synchronization, minimizing transfer times and bandwidth usage while maintaining the security benefits of encrypted communication. Alternatively, you can use version control systems like Git to manage code changes and configure CI/CD pipelines to transfer files to the server.
18 – Pick a hosting provider that cares about security
Choosing a security-conscious hosting provider is crucial for maintaining a secure WordPress website. A reliable hosting provider is the first defense against many common web attacks.
When publishing your website online, you should evaluate potential providers based on their security features, including:
- Firewall protection
- Intrusion detection systems
- Malware scanning
- Regular security updates
Before purchasing a plan, you should inquire about their incident response procedures and data backup policies. A provider with a proactive approach to security will offer features such as server hardening, DDoS mitigation, and secure server configurations.
Beyond technical measures, assess the provider's commitment to security practices. Look for evidence of security certifications and compliance with industry standards. A provider that actively invests in security infrastructure and personnel demonstrates a solid commitment to protecting its clients' websites.
Tip: If you want to know more about this topic, listen to our Patchstack weekly episode, in which we discuss how to choose a secure hosting provider. Alternatively, if you are a hosting provider, you can request a free report to assess the security of your users.
19 – Protecting wp-admin and wp-login against brute-force attacks
Let's discuss your WordPress site's most sensitive entry point: the /wp-login.php URL. This is where everyone, including unwelcome guests, tries to gain access. This is your website's front door, and you should make it as secure as possible.
Limiting access to your WordPress admin area (wp-admin) to specific IP addresses drastically reduces the attack surface for brute-force attacks and unauthorized access attempts. By configuring your web server only to accept connections from trusted IP addresses, you effectively block malicious actors from reaching the login page.
One powerful way to do this is by using Cloudflare Access. It provides a strict security checkpoint where everyone must verify their identity before getting in. You can set up Cloudflare Access to require extra authentication for your /wp-admin area and /wp-login.php page. This means attackers won't see your login screen unless they pass Cloudflare's checks first.
Alternatively, if you're using Patchstack, you have an even simpler option. With just a few clicks, you can change your default WordPress login URL to something unique and unpredictable. This effectively blocks many automated attacks that target the standard /wp-login.php address.
However, just changing the URL is not enough! You should also consider integrating robust brute-force protection mechanisms that actively monitor login attempts and identify and block suspicious activity, such as repeated failed logins from a single IP address.
In this post, we recommended using WAFs, which can often temporarily ban the offending IP addresses, but they are not a fool-proof solution. If all your users are from a single country, you can consider blocking all visitors from that country or geographic region. Additionally, you can use CAPTCHAs to thwart brute-force attacks.
20 – Mitigating DoS and DDoS Attacks
Denial-of-Service (DoS) and Distributed Denial-of-Service (DDoS) attacks aim to overwhelm your server with traffic, making your website inaccessible. DoS attacks are often confused with brute-force attacks as both involve high volumes of requests; however, DDoS attacks differ significantly in their goals and methods.
The main purpose of a DoS attack is to overwhelm your servers so your website or service is unavailable to legitimate users. There are several things that you can do to stop DDoS attacks:
- Web Application Firewall (WAF): A WAF, particularly an external cloud-based WAF, is the most effective defense against DDoS attacks. WAFs filter malicious traffic before it reaches your server, protecting your resources from being overwhelmed.
- Content Delivery Network (CDN): CDNs distribute your website's content across multiple servers, absorbing some of the traffic and reducing the impact of DDoS attacks.
- Rate Limiting: Server-level rate limiting can help throttle excessive requests from specific IP addresses, mitigating the impact of smaller DoS attacks.
- Geo-IP Blocking: While not a foolproof solution, geo-blocking can help restrict traffic from known malicious regions. However, attackers can often circumvent this using VPNs.
While CAPTCHAs can help protect against brute-force attacks by interrupting automated scripts, they are less effective against large-scale DDoS attacks. The sheer volume of traffic in a DDoS attack can overwhelm server resources even if CAPTCHAs are implemented. Therefore, relying solely on CAPTCHAs for DDoS protection is insufficient.
Additionally, XML-RPC used to be a significant component of the WordPress API, but its relevance has diminished considerably with the rise of the REST API. Currently, XML-RPC is primarily seen as a potential attack vector for DDoS attacks rather than a practical tool for legitimate users.
Therefore, unless you have a specific, identified need for XML-RPC functionality, it's generally recommended to keep it disabled. For most users, leaving XML-RPC disabled provides a small security benefit with no loss of practical functionality.
If you want to learn more, read our previous post, in which we explain how to protect your website from DDoS attacks.
Data Security & Access Control Checklist
File permissions
Understanding file permissions is essential for hardening your WordPress installation and mitigating potential security risks. Proper file permissions play a crucial role in maintaining a secure environment. For instance, your wp-config.php file containing sensitive database credentials should have highly restrictive permissions (ideally 400 or 440) to prevent unauthorized access.
If you use a third-party WordPress hosting service, you should note that not all hosting providers are created equal. Some may not adequately protect crucial files like wp-config.php. Others might employ advanced security measures like isolating core WordPress files (wp-admin and wp-includes) from user-modifiable directories, as seen with platforms such as Flywheel (now part of WP Engine). This separation significantly limits the impact of potential vulnerabilities in themes or plugins.
Therefore, when choosing a hosting provider, consider their security practices. Do they actively protect sensitive files? Do they offer features such as isolated core files? Understanding these aspects can help you choose a host that contributes to a more secure WordPress environment.
For a deeper dive into the complexities of WordPress file permissions and how they relate to security, we recommend checking out a previous Patchstack blog post dedicated to this topic: WordPress File Permissions – The Complete Guide.
21 – Keep regular (or real-time) backups of your website
We strongly recommend keeping at least three copies of your data in different places (such as a cloud service and an external drive) and never storing them where people can find them on your website.
Many clever hackers use advanced Google searches to look up exposed backup files that can be downloaded without restrictions.
Therefore, if you store a copy of your backup on the same server for fast retrieval, you should protect it with strong passwords and encryption. Additionally, you should ensure that these files are not accessible to the Internet.
The biggest mistake people make isn't forgetting to back up - it's never testing their backups. Set up automatic backups to run daily, but try restoring your entire website every few months from a backup on a test server. It's like doing a fire drill – you want to know precisely how to get everything back up and running before a real emergency.
If you are looking for a good backup plugin for your WordPress website, you should read our recent post in which we evaluated the best backup plugins and services for WordPress.
22 – Operate with the Principle of Least Privilege (control user access & permissions)
Think of user permissions like the keys to your office – you wouldn't give a maintenance worker keys to your safe. You should apply the same principle to your WordPress site by following the rule of least privilege and giving users only the access they need to do their jobs.
The Principle of Least Privilege (PoLP) is a fundamental security control mechanism where system access rights are strictly constrained to the minimum permissions necessary for users to perform their authorized functions. When implementing PoLP in WordPress environments, you can use WordPress's hierarchical role structure to enforce the segregation of duties and maintain robust access control.
While PoLP is excellent for enhancing security, let's talk about a sneaky security issue that can trip up even the best PoLP setups: privilege creep.
Imagine this: someone in an organization gets a temporary promotion and gains extra access, or maybe they switch teams and keep their old permissions along with the new ones. Over time, these little additions can pile up, giving people more access than they need. This makes your system a much easier target for attackers.
You should set up systems that automatically expire unnecessary access after a specific time. Regular check-ins and reviews can help ensure everyone has just the right level of access – no more, no less. And, of course, keeping detailed logs of permission changes is key for tracking suspicious activity.
After Action Report – Strengthening WordPress Security
In this guide, we have summarized key steps to enhance your WordPress website's security. However, before diving into website-specific measures, it's crucial to address the foundation of your online security: your own devices.
Ensure all devices used to manage your website have up-to-date antivirus software and use strong security practices. A compromised admin device can render all other website security measures ineffective.
Website security can appear daunting, but implementing effective measures doesn't have to be complicated. This guide explains how securing your login credentials, choosing strong passwords, and enabling multi-factor authentication (MFA) can enhance security.
Don't let security concerns overwhelm you. Take control of your WordPress security today by signing up for Patchstack!

