This blog post explains how to write custom firewall rules using Patchstack app.
Patchstack App users get automatic protection against new plugin vulnerabilities via the default WAF (web application firewall) rules which are enough for most site owners. But, did you know the Patchstack app supports custom WAF rules as well?
Knowing how to write custom firewall rules in the Patchstack app may come in handy if you identify malicious web traffic and want to put it to a stop immediately. In this article, I will show you how.
Writing custom firewall rules with Patchstack
Default rule sets for firewalls are great, but sometimes anomalous traffic can bypass default rules. Perhaps an exploit is so new the default rules may not detect it, or sometimes you just want to block an IP address that is making a lot of suspicious requests. That is why knowing how to write custom firewall rules with the Patchstack app will come in handy.
The first thing you will need to write an effective rule is evidence. Evidence of malicious traffic that is. This can be found in your website access logs. Different hosts have different locations for these logs, so you may need to look up or ask where your webserver's access and error logs are located.
Here is a literal example of "MALICIOUS" requests in logs …

You can take immediate action by adding a new firewall rule.
Steps to create custom firewall rules
- Open Patchstack App dashboard and navigate to Protection -> Rules
- Click on the "+ Create Rule" button
- You can add the IP address you wish to block in the "If the IP matches …" field, or leave the IP field blank to match any IP address
- Since I want to block those requests with the string "MALICIOUS" in them, I add that to the "If the requesting URL contains …" field.
- There are a few other options here, including an Advanced View, but I will get into those later.
- Click on "+ Create Rule" button at the bottom, and you will be sent back to the Rules page.
- Now that you have created a rule, you need to attach it to one or more websites.
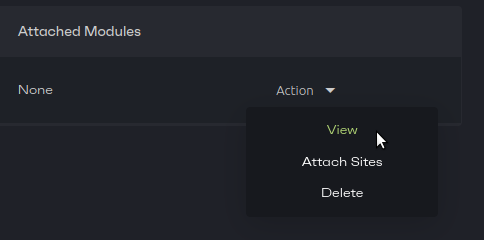
- Click on the "Action" drop down, and select "Attach Sites"
- Choose the site(s) you wish for this rule to run on, and close the window.
- Now you can either wait for the next automatic sync, or click the "Resync Sites" button to sync your website(s) immediately.

Check if your rule creation was a success
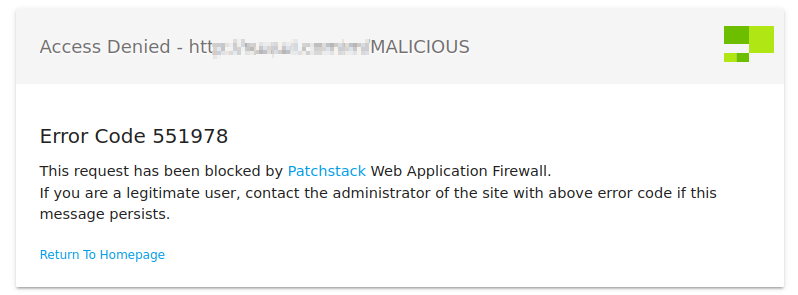
Now visitors will get an "Access Denied" response when we make a request to that URL.

The access logs show the same 403 error code as well. Notice the first request's response code is 404, then it changes to 403 after the rule has been applied.

That is how a basic string matching rule works, but, let's say you want to get a bit more advanced … we can block those SUSPICIOUS requests we can see in the log files above as well, using just a single firewall rule, when we harness the power of regex.
Advanced rules and Regex
Open up the Patchstack app's Firewall Rules page again, and click the "Action" drop-down for the rule of choice. This time choose "view" and you will get the "Advanced View" (mentioned earlier) of the firewall rule you chose.

There are a lot of options on this page, but scroll down a little and you can find the match string we set up before. It will look a little different, that is because it has been converted into a regex rule.

Utilizing Regex, I can re-write this rule to match both MALICIOUS and SUSPICIOUS with /((MAL|SUSP)ICIOUS)/msi , now isn't that clever!

Let me break down the above regex for you.
The / and / are the beginning and ending bounds of the regex rule, the ((MAL|SUSP)ICIOUS) is the regex rule itself.
We start with the (parenthesis) which can be understood just like in algebra, they group together the rules and set the order of operation.
The order here will be to match "(MAL|SUSP)" first and then match "ICIOUS" immediately after. The first part has two strings "MAL" and "SUSP" separated by the pipe character "|" (it looks a lot like a capital "i", but it is not "I").
The pipe character works as a logical "or". So, this rule can be read as matching a string that starts with "MAL" or "SUSP" first and ends with "ICIOUS" after. E.g.. It will match MALICIOUS or SUSPICIOUS.
Finally, that "msi" at the end. That is the regex rule's flags, each letter turns on a specific setting.
- The "m": tells the rule to match over multiple lines
- The "s": sets the dot "." character which normally means "any character" to also include newline characters as well.
- The "i": Is probably the most impactful, it makes regex rule case-insensitive. Which means the rule will match strings like "malicious" and "Suspicious" as well as "MALICIOUS" or "SUSPIcious". If you do not want a rule to be case-insensitive, simply remove the "i" flag.
Now, these are advanced features but we are following industry standards so you can look up all of the regex modifiers here.
Most people with technical knowledge can make sense of the regex rules, but if you find yourself confused or things are not working as you expect, feel free to reach out to the support team and we can get a regex expert to help you out. You can also learn more about regex if you are starting from scratch.
Regex is a valuable technical skill to learn, and a powerful tool to get code to do complex pattern recognition.
Now, all that is left to do is save the rule and re-sync. Then you can test it out just like we did before, either with a browser or in the access logs.

Final notes
Feel free to play around with the WAF rules yourself, you can do some testing using a development website first and only attach the WAF rule to that website.
Once you feel comfortable with the new rule, attach it to your production or live website and re-sync.
The workflow is pretty intuitive once you practice with it a little, but until then, just reference this doc and the steps outline above.
I hope this tutorial was helpful in understanding how to write custom web application firewall rules using the Patchstack App.


