
Did you know that, on an average, every hour of downtime causes revenue loss of between three to four hundred thousand dollars for 25% of businesses globally?
Yes, you read that right!
In today's hyper-connected digital landscape, every second counts, and your website's uptime is non-negotiable.
If your business depends on your website, then you must consider monitoring its uptime and availability.In this article, we will explore the benefits of monitoring, as well as discuss how immediate notifications and other preemptive measures help to ensure your website remains operational.
Choosing the right uptime monitoring tool
There is a huge range of uptime monitoring services available in the market, which makes selecting the right service for your use case difficult. In this article we have covered some of the most popular options to guide your choice, including:
- UptimeRobot
- BetterUptime
- ManageWP
- WP Umbrella
- Jetpack Monitor
You can pick a tool from the above list or use something else entirely. Regardless of your choice, most of the commercial uptime monitoring services offer a comprehensive list of features such as:
- Constant Monitoring: This means your monitoring tool keeps an eye on your website all the time, 24/7. It doesn't take breaks. It's like having a security camera that never blinks.
- Global Checks: It's important to make sure your website works well for everyone, no matter where they are. That's why your tool should check your website's status from different parts of the world. It's like checking if your store's lights are on in every neighborhood.
- Instant Alerts: A monitoring tool should be quick to let you know if something's wrong. A good monitoring service sends you emails or text messages right away when there's an issue.
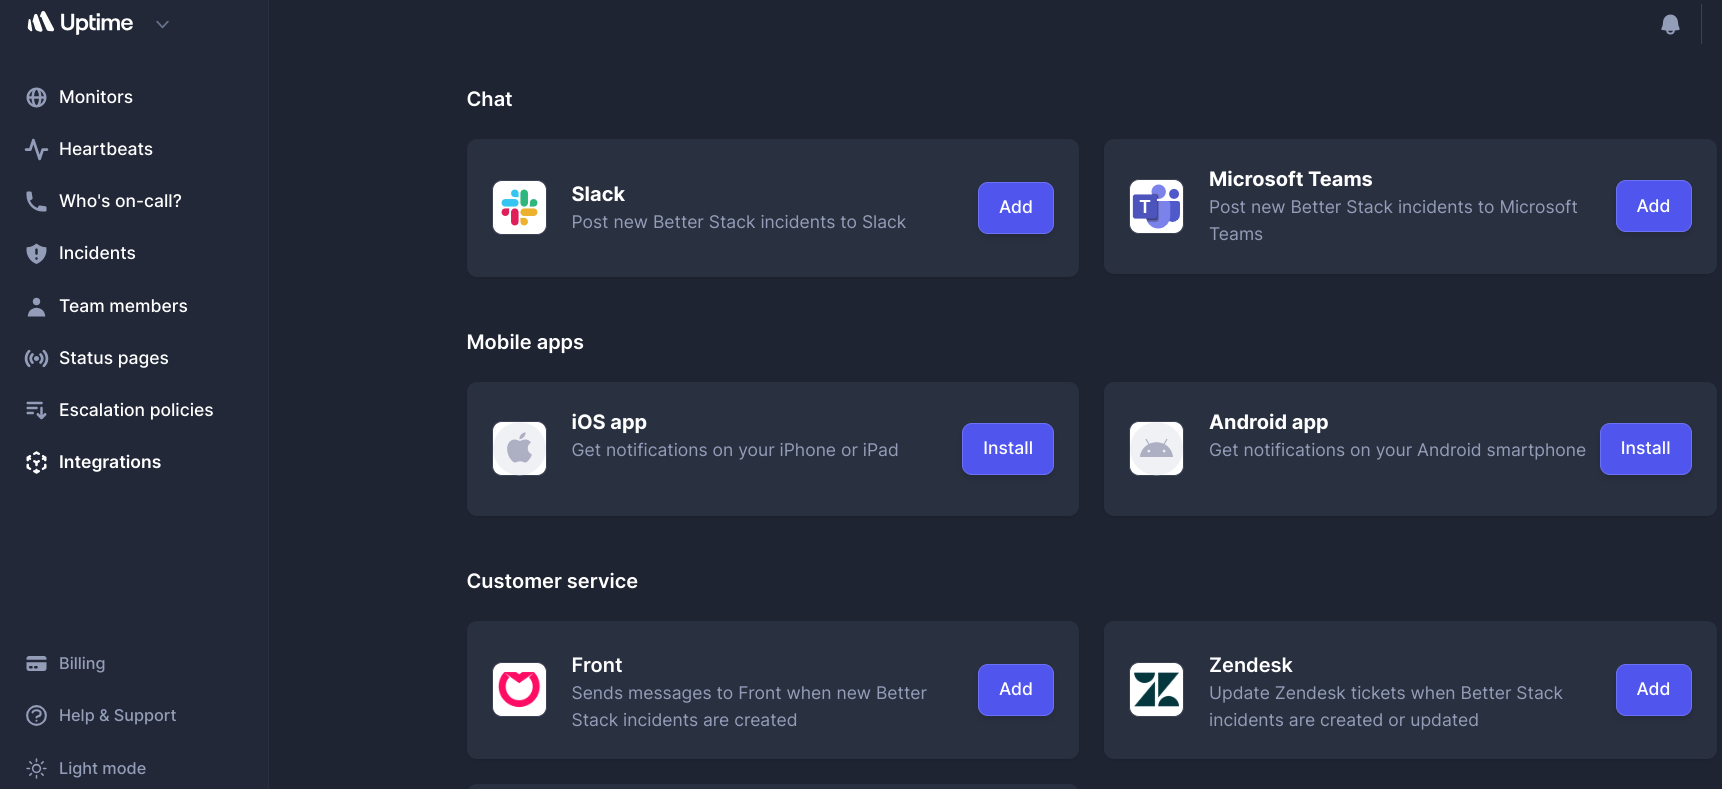
- Team Collaboration: When problems arise, you need to work together with your team to fix them. Integration with tools such as Slack or project management apps makes this easier. It's like having a group chat where you discuss and solve issues together.
- Past logs and Incidents: The tool should keep a record of past issues. This way, if something goes wrong, you can refer back to the previous reports and quickly resolve the issue.
- Recovery Notifications: After a problem is resolved, your tool should let you know that everything is back to normal.
- Clear Status Updates: To build trust with your audience, you can create a dedicated "Status" page. This page shows that you're transparent about any issues, and assures your visitors that you're on top of things.
Let's explore the step-by-step process of setting up uptime monitoring for your WordPress website.
In this tutorial, we will demonstrate using BetterUptime, a service offering a free plan with the option to upgrade for additional features.
How to set up uptime monitoring on your WordPress website
Step 1: create an account on BetterUptime and add a URL for monitoring
Begin by registering a free account on BetterUptime. During the signup process, you can specify the website URL you intend to monitor. Later, you can expand your monitoring to include multiple websites.
Step 2: Setup monitors
After creating an account, log in to your dashboard to create your first monitor. When setting up monitoring for your website within the dashboard, you'll come across different alert options. In most cases, it's advisable to opt for the "Becomes Unavailable" alert type. This selection ensures that you receive notifications whenever your website is no longer accessible.
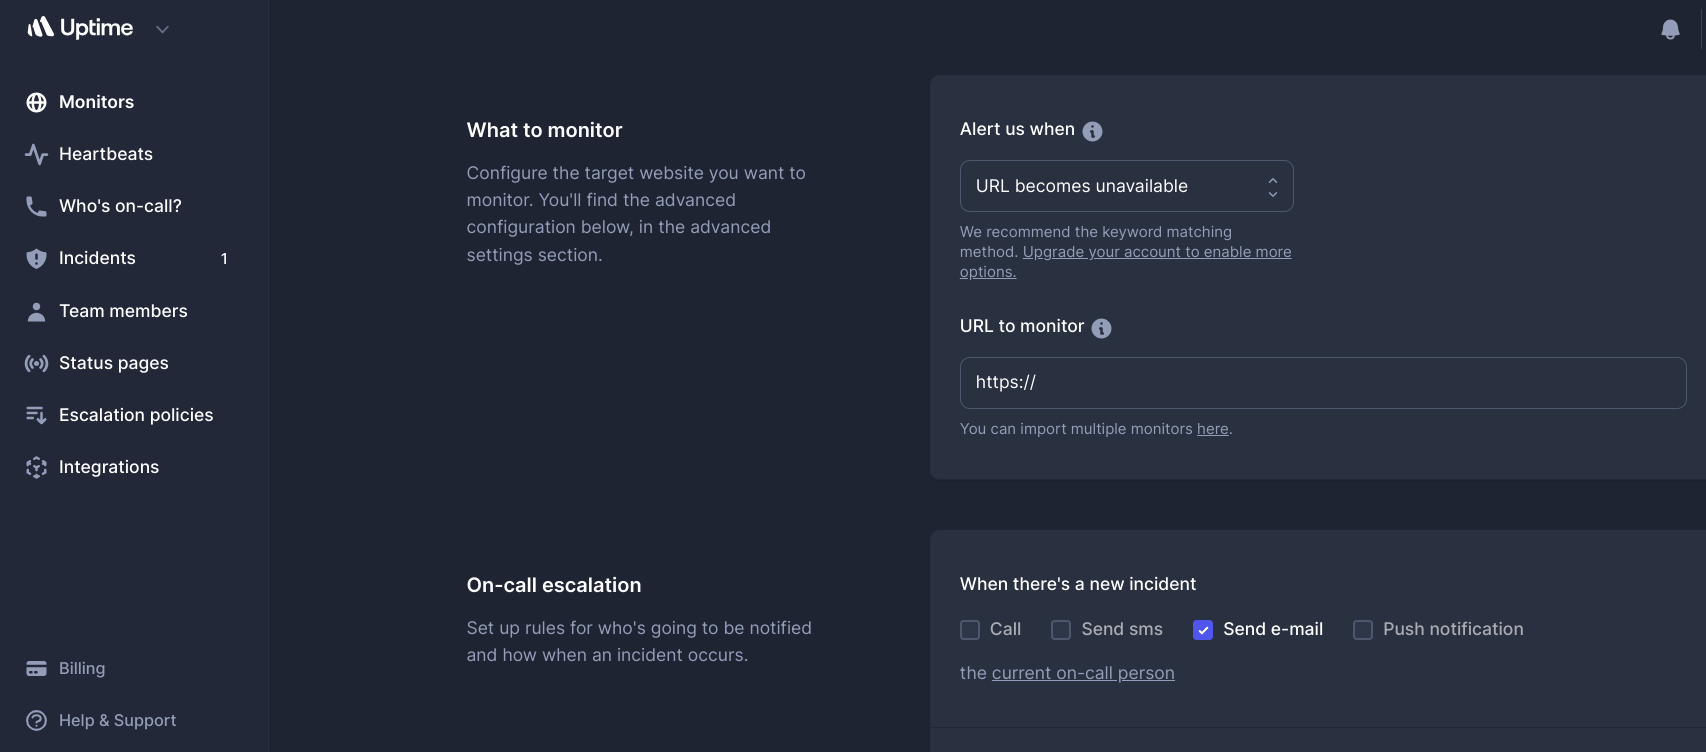
There are multiple ways to configure a monitor. For example, you can receive notifications should the URL become unavailable, or the URL does not contain a specified keyword, or when the URL does not respond to a ping, and so on.
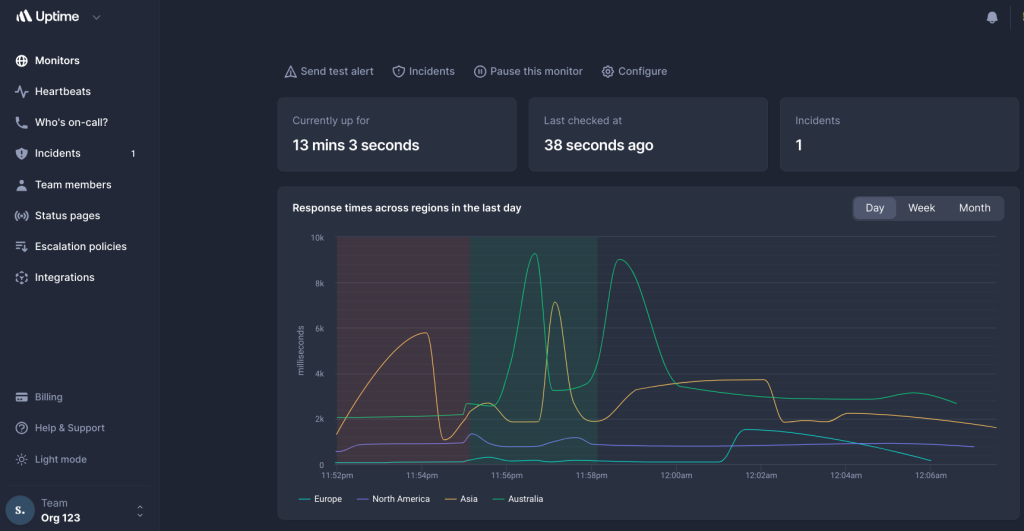
After you have created your monitor, you will be able to see your website statistics in the dashboard within a few minutes.
Step 3: Define alert types
Once you've taken the initial steps to set up monitoring for your website, the next crucial phase is configuring alert types. Configuring alert types and notification preferences ensures that you stay informed in real-time, and can take swift action to address any issues that may arise – ultimately contributing to the reliability and uptime of your website.
Each monitoring tool may offer slightly different options, but here are some common features you'll typically encounter:
- Team Collaboration: Most monitoring tools provide a feature that allows you to add your team members to your monitoring setup. This step is essential for ensuring that the right individuals are informed when issues arise. It also enables collaborative problem-solving.
- On-Call Rotations: Many tools offer the capability to set up on-call schedules. This means you can designate specific team members to be responsible for monitoring and responding during particular time periods. Knowing who is on-call at any given moment is critical for effective incident management.
- Notification Channels: Different tools offer a variety of notification channels, such as push notifications, emails, SMS messages, or even phone calls. This array of notification options ensures that alerts reach the right individuals through their preferred means of communication.
Integration with Communication Platforms: Many monitoring tools seamlessly integrate with popular communication platforms such as Slack, Microsoft Teams, or other team collaboration tools. This integration streamlines the process of alerting team members, and facilitates quick responses and communication during incidents.
After configuring these alert settings, you'll be all set to receive notifications through your preferred channels.
Depending on your preferences and the severity of the issue, you can expect to receive push notifications on your devices, emails in your inbox, SMS messages on your phone, or even a phone call in critical situations.
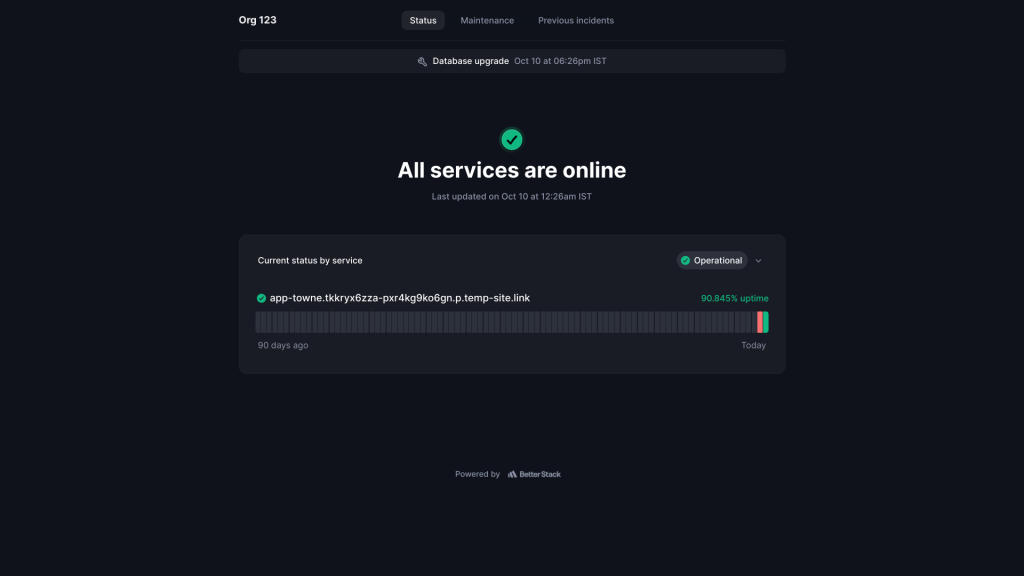
Step 4: Configure your status page
After setting alerts, configuring your status page is a crucial step in setting up monitoring. This feature offers several benefits, and serves as a valuable tool in maintaining transparency and communication with your audience. Here's why you should use it:
- Transparency and Trust: A ‘Status’ page demonstrates transparency, showing your commitment to keeping your audience informed about the health of your services. This transparency fosters trust with your users, assuring them that you take downtime seriously and are actively working to resolve issues.
- Historical Reports: The ‘Status’ page often provides reports over a specified period. These reports showcase the performance of your service over time, highlighting periods of uptime and any incidents or outages. These historical records can be valuable for understanding your service's overall reliability.
Centralized Information Hub: During service disruptions or planned maintenance, the ‘Status’ page becomes a centralized hub for providing crucial information to your users. It serves as a go-to resource for real-time updates on ongoing incidents, expected resolution times, and any steps users can take to mitigate the impact on their end.
Strategies for improving WordPress website uptime
Reacting to issues after they occur may not be the most prudent approach. Instead, it's advisable to implement preventative measures that can safeguard your website against significant outages.
Various factors can cause a WordPress website to experience downtime, but you can take steps to reduce or mitigate these common issues.
Tip 1: Keep WordPress core, themes, and plugins updated
Outdated WordPress files, whether they belong to the core, themes, or plugins, can render your website vulnerable to security breaches and potential takedowns.
To mitigate this risk, regularly update all of your WordPress components. However, manually managing updates, especially for multiple WordPress sites, can become time-consuming and repetitive.
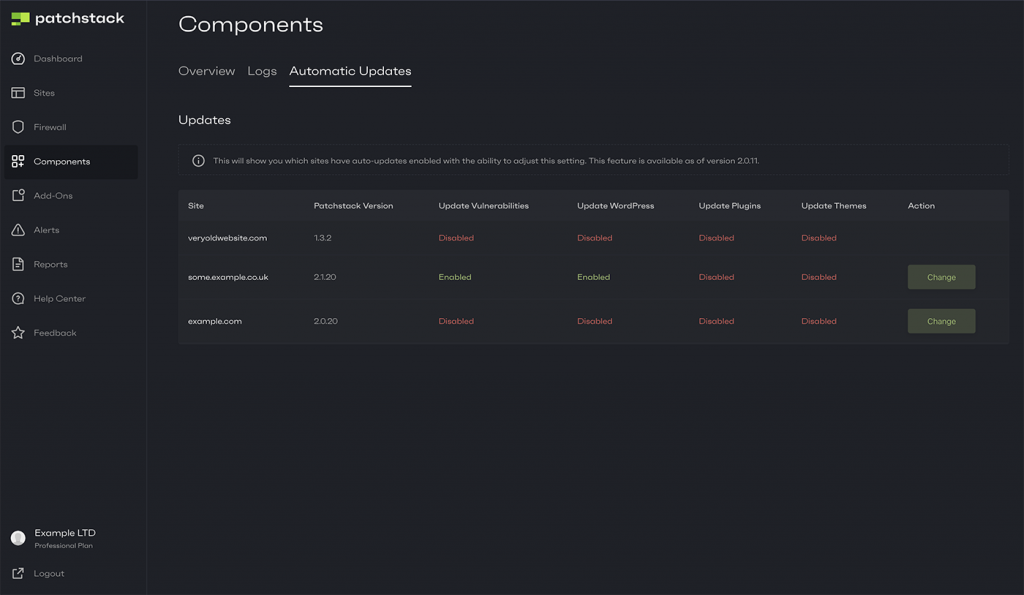
Consider using a service such as Patchstack, which provides notifications regarding outdated or vulnerable themes and plugins on your site.
Moreover, Patchstack allows you to enable automatic updates via its dashboard, ensuring that your themes and plugins stay current whenever new versions are released.
Tip 2: Pick a dependable hosting provider
Selecting an appropriate hosting environment is critical for preventing website downtime. Hosting your WordPress websites on shared servers or servers with limited resources increases the likelihood of downtime, especially when facing traffic spikes or executing resource-intensive PHP code.
This downtime typically ends once server resources, such as RAM and CPU, become available again.
To enhance uptime, consider migrating to reputable cloud servers such as AWS EC2, Google Cloud, or Microsoft Azure. Fortunately, the WordPress ecosystem offers numerous reliable hosting providers, including:
- WP Engine
- Pagely
- Plesk
- One.com
- Hostinger
- A2Hosting
- Convesio
- Gridpane
Tip 3: Implement a caching solution
Caching repeated requests is an excellent way to reduce the stress on your hosting server’s hardware, and can help improve the speed and survivability of your WordPress website.
You can use a caching plugin such as W3TC or WP Rocket – or ask your hosting provider to help configure the necessary caching solutions on your website.
Tip 4: Monitor server resource utilization
Many new WordPress websites start with basic hosting packages. As your website gains popularity and traffic, it becomes important to assess your server's resource usage.
Regularly monitoring server statistics enables you to make informed decisions about upgrading components such as RAM, CPU, or disk space, to ensure your website's reliability.
Tip 5: Implement a Content Delivery Network (CDN)
Content Delivery Networks (CDNs) such as Cloudflare and BunnyCDN are popular choices within the WordPress community. CDNs cache static content, such as images, CSS, and HTML, and serve it through their distributed servers.
This additional layer of security and performance can help your WordPress website withstand traffic surges. In some instances, if your primary hosting server experiences downtime, the CDN can serve a static version of your site, minimizing disruptions.
Final thoughts
Adding an uptime monitoring service on your WordPress website helps you to be better informed whenever your website goes down.
Additionally, keeping the logs of past incidents also helps if you want to track the performance of your current hosting setup. If your website faces frequent downtime, you can use a monitoring service to identify the underlying cause and fix it.
Ready to supercharge your site's security and performance? Sign up for Patchstack today!
Patchstack alerts you the moment a vulnerability is detected in any plugin on your website, keeping you and your data secure. Don't wait, protect your site now by signing up for Patchstack!


