WordPress is (by far) the most popular content management system – and of course, as big advocates ourselves, it’s easy to see why. That said, powering more than 40% of all websites on the internet also means WordPress sites are targeted every day.
But, although they are the target of attempted attacks every single day – most are unsuccessful (so no need to panic), and you can put additional security measures in place on your own sites to lock them down even further.
And that’s what you’re here for today: limiting login attempts on your WordPress website because one of the most common attempts includes trying to brute force a site’s login.
And while it goes without saying that having strong passwords reduces the chances of getting hacked, it doesn’t prevent random users (and bots) from trying to log in to your website by trying thousands of leaked passwords and username combinations.
So, in this article, we’ll cover why you should limit login attempts on your WordPress websites and walk through the different methods available.
WordPress Default Login Settings
In a standard WordPress installation, the default login attempt settings are relatively permissive. These settings are designed to be user-friendly but are highly likely to pose security risks if left unmodified.
Here are some of the settings standard WordPress doesn’t have, that are nonetheless important to enhance the security of your website:
- Unlimited Login Attempts: By default, WordPress allows users to make an unlimited number of login attempts. This means that if an attacker attempts to guess usernames and passwords repeatedly, there are no built-in safeguards to block their access.
- No Delay Between Login Attempts: WordPress doesn’t introduce any delays or rate limiting between login attempts. This absence of delay facilitates brute force and dictionary attacks, where attackers can rapidly test multiple username and password combinations.
- No Lockout or IP Blocking: In a standard installation, WordPress doesn’t automatically lock out users or block IP addresses after a certain number of failed login attempts. This means that an attacker can keep trying different combinations indefinitely without any automatic countermeasures, restrictions, or penalties.
Understanding the Need for Login Attempt Limits
Limiting login attempts is crucial for WordPress security for several important reasons:
- Protection Against Brute Force Attacks: Brute force attacks are among the most common methods used by malicious actors to gain unauthorized access to WordPress websites. In a brute force attack, hackers use automated tools to repeatedly guess usernames and passwords until they find the correct combination. By limiting login attempts, you make it significantly more difficult for attackers to guess the correct login credentials through trial and error.
- Preventing Credential Stuffing: Credential stuffing is a type of attack where cybercriminals use username and password combinations obtained from data breaches on other websites to gain access to WordPress sites. By limiting login attempts, you reduce the likelihood of attackers successfully using these stolen credentials to compromise your site.
- Mitigating Distributed Denial of Service (DDoS) Attacks: Some DDoS attacks target the login page of a WordPress site by overwhelming it with a massive number of login attempts. By implementing login attempt limits, you can minimize the impact of such attacks and ensure that your site remains accessible to legitimate users.
- Protection Against User Enumeration: WordPress typically provides error messages that differ based on whether a username or password is incorrect during a login attempt. Hackers can use this information to determine valid usernames and then focus their attacks on cracking the associated passwords. By limiting login attempts, you reduce the effectiveness of this technique.
Customizing login attempt limits and enhancing security is crucial to address these risks. By implementing appropriate plugins or custom configurations, you can:
- Set limits on the number of failed login attempts before lockout.
- Define lockout durations to discourage further attacks.
- Implement rate limiting to prevent rapid login attempts from the same IP address.
- Enforce strong password policies.
- Add two-factor authentication for an extra layer of security.
Customization of these settings not only helps protect your WordPress site from common login-related attacks, but also improves the overall security posture of your website, making it significantly more resilient to unauthorized access attempts.
Methods to Safeguard/Limit Login Attempts
There are different ways that can be used to limit the number of login attempts on WordPress, such as:
#1 – Using a WordPress Plugin
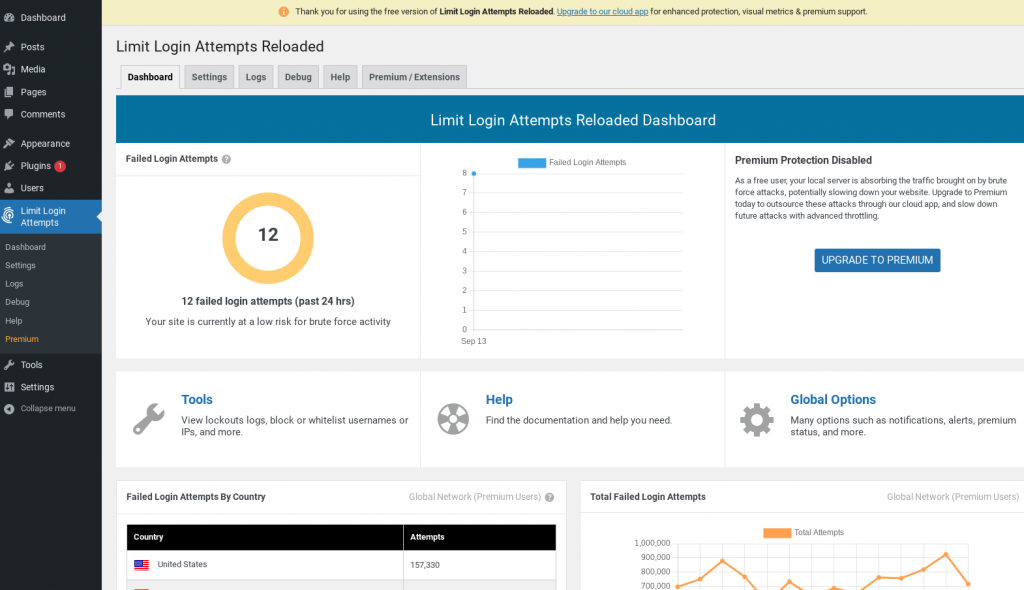
You can enhance the security of your WordPress site by using specialized plugins such as Limit Login Attempts, Limit Login Attempts Reloaded, or iThemes.
Plugins are a powerful tool for enhancing the security of your WordPress website by mitigating login-related threats without needing to modify site settings.
Many plugins offer a range of features, including IP blocking, performance optimization, and intelligent IP management. However, it’s also important to note that installing any additional plugins inadvertently increases the attack surface.
However, in the past, we have found vulnerabilities in some of the plugins mentioned above (Limit Login Attempts Reloaded and Limit Login Attempts).
Although these vulnerabilities are few and far between, and these alone obviously don’t go as far as to suggest that they do not have a good reputation or commitment to security. Ultimately, security plugins that run solely on your WordPress site directly can help with certain things and are super easy to set up, so it is easy to see why they are often a first choice.
Patchstack (hey, that’s us 👋) is powered by the WordPress ecosystem’s most active community of ethical hackers, and is trusted by the leading WordPress experts such as Pagely, Cloudways, GridPane, Plesk, and many others, making it the safest and smartest choice for keeping your WordPress site safe.
Log in to your WordPress dashboard and install the plugin of your choice.
Once activated, you will be able to set the maximum number of allowed login attempts, lockout duration, and other basic settings.
Depending on the plugin that you choose, you might also be able to enable “Lockout/IP Throttling”. Doing this establishes longer lockout intervals each time a hacker or bot unsuccessfully attempts to log in.
It is also advisable to activate “Synchronized Lockouts” in order to share lockout data between multiple domains if you operate more than one WordPress site.
#2 – Use CAPTCHA
You can use a CAPTCHA (Completely Automated Public Turing test to tell Computers and Humans Apart) or a challenge-response test in WordPress to limit login attempts and enhance security. Although some sophisticated modern AI robots can reliably solve these tests, these require significant resources, and implementing a CAPTCHA on your site will still deter a large number of automated attacks.
When using this approach, you will need to decide which CAPTCHA service you want to use. Popular options include Google reCAPTCHA and hCaptcha. Both are widely supported and effective at distinguishing between human users and automated bots, although hCaptcha is the more secure option out of the two, and the better choice in our opinion. Another alternative is Cloudflare Turnstile, which is different because it doesn’t make users solve puzzles to prove they’re human.
#3 – Use a firewall
Using a firewall in your webapp is another way to limit login attempts. For example Patchstack’s default firewall will automatically block suspicious repeated login attempts.
#4 – Monitor Logs
You can also use Fail2Ban to monitor Apache2 logs and block websites that make too many login attempts. Fail2Ban is a powerful tool that scans log files for patterns and takes action against IP addresses that exhibit suspicious behavior. Here’s how you can set it up for WordPress login protection:
- Install Fail2Ban: This package is not installed by default on most systems. You can install it using the package manager relevant to your server’s operating system (e.g., apt-get for Debian/Ubuntu, yum for CentOS/Red Hat).
- Create a Custom Fail2Ban Filter: We need to create a custom filter configuration for Fail2Ban to recognize failed login attempts in your Apache2 logs. Make a new configuration file (e.g., wordpress-login.conf) in the /etc/fail2ban/filter.d/ directory. Define the filter rules to match failed login attempts in your Apache2 logs.
# /etc/fail2ban/filter.d/wordpress-login.conf
[Definition]
failregex = ^<HOST> .* "(GET|POST) /wp-login.php.*" 401
This configuration is tailored for the common WordPress login URL (/wp-login.php) and assumes that a failed login attempt results in an HTTP 401 status code.
- Create a Fail2Ban Jail: Next, we will create a Fail2Ban jail configuration to specify how Fail2Ban should handle IP addresses that pass the filter rules. Create or modify the /etc/fail2ban/jail.local file:
[wordpress-login]
enabled = true
filter = wordpress-login
port = http,https
logpath = /var/log/apache2/access.log
maxretry = 3
findtime = 600
bantime = 3600
Here is a brief explanation of each line of the above configuration:
- enabled: Set to true to enable this jail.
- filter: References the filter configuration you created earlier.
- port: Specifies the ports Fail2Ban should monitor for suspicious activity.
- logpath: Specifies the path to the Apache2 access log where login attempts are logged.
- maxretry: Defines the number of failed login attempts allowed before an IP address is banned.
- findtime: Sets the time frame (in seconds) within which the maximum number of retries (maxretry) must occur to trigger a ban.
- bantime: Specifies the duration (in seconds) for which an IP address will be banned.
Restart Fail2Ban: After configuring the jail, restart the Fail2Ban service to apply the changes. Fail2Ban will now monitor your Apache2 logs for failed login attempts on the WordPress login page.
#5 – Use wp_login_failed WordPress Hook
The wp_login_failed hook in WordPress is an action hook that triggers when a user’s login attempt fails. It allows developers to execute custom code in response to failed login attempts, enabling actions such as logging failed login details or implementing security measures such as IP blocking after a certain number of failures.
Here’s a simple code snippet that demonstrates how to use this hook. We define the block_failed_logins function, which takes two parameters – the username and a WP_Error object containing the error details:
// Define a custom function to block users
function block_failed_logins($username, $error) {
    // Check if the error message contains a specific keyword or pattern
    if (strpos($error->get_error_message(), 'Your custom error message or pattern here') !== false) {
        // Get the user's IP address
        $user_ip = $_SERVER['REMOTE_ADDR'];
        // Block the user by IP address using .htaccess, firewall rules, or your preferred method
        // For demonstration purposes, we'll display a message and exit here
        die('Access denied. Your IP address (' . $user_ip . ') has been blocked due to repeated failed login attempts.');
    }
}
// Hook the custom function to the wp_login_failed action
add_action('wp_login_failed', 'block_failed_logins', 10, 2);
Inside the function, you can check the error message (or any other relevant data) to determine when you want to block users. Modify the condition within the “if” statement to match your specific criteria. For example, you can check for a particular error message or pattern that indicates multiple failed login attempts.
If the condition is met, you can retrieve the user’s IP address using $_SERVER[‘REMOTE_ADDR’]. Replace the placeholder with your preferred method of blocking the user, such as adding IP addresses to a blocklist in your server’s firewall, using .htaccess rules, or any other method you prefer.
For demonstration purposes, we’ve included a “die” statement to display a message and then exit when a user is blocked. In a production environment, you would typically perform the actual blocking action here.
#6 – Limiting Login Attempts: Best Practices
After implementing the above solutions, work towards implementing the following practices to enhance your user experience:
- Whitelisting for IP Protection: Take precautions by whitelisting trusted IP addresses, including your own, to avoid inadvertent lockouts. This ensures that authorized users won’t be locked out due to excessive login attempts.
- Tailored Error Messages: When users encounter lockout situations, it’s crucial to provide clear and helpful error messages. Customize these messages to offer precise instructions on how they can regain access to their accounts. Clear guidance enhances the user experience and reduces frustration during login difficulties.
Testing the Login Attempt Limits
- Prepare a Test Environment: Before testing, create a separate test environment that mirrors your live WordPress site. This can be a staging site or a local development environment. Make sure you have access to the WordPress admin dashboard of this test site.
- Install and configure the login attempt limiting solution on the WordPress staging site created in the previous step.
- Attempt to log in to your test site using both valid and invalid credentials to ensure that you can access the admin dashboard without any issues. Ensure that the plugin correctly enforces the login attempt limits you’ve set.
Note: When attempting to log in using invalid credentials, make sure to use a secondary internet connection so that your primary IP address doesn’t get blocked. For example, if you are working with a WiFi connection on your laptop, use your mobile carrier’s internet connection to log in to WordPress.
- Purposefully exceed the maximum allowed login attempts to trigger a lockout. This will help you confirm that the plugin correctly enforces lockout durations.
- Review the pertinent logs and notifications to see if they are accurately recording failed login attempts, lockout events, and any notifications sent to administrators.
Additional Security Measures
Complementary security measures play a vital role in enhancing login security for your WordPress website. Here are some key measures to consider:
#1 – Two-Factor Authentication (2FA)
Encourage users, especially administrators and other privileged users, to enable 2FA for their accounts. Implement reliable 2FA methods such as time-based one-time passwords (TOTP) or hardware tokens for added security.
#2 – Regular Software Updates
Keep your WordPress core, themes, and plugins up to date.
Updates often include security patches that address known vulnerabilities.
Consider using automated update tools such as Patchstack, which also vPatches vulnerable plugins with remote updates directly applied to your sites for you.
#3 – User Account Management
Assign appropriate user roles to minimize the number of users with administrative privileges. Keep in mind the “principle of least privilege”, and only give users the access they need to do a job (and no more). Regularly review and remove accounts that are no longer necessary, reducing the potential attack surface.
#4 – Educate Users
Promoting robust website security goes beyond technical measures; it also involves educating your website users, with a special focus on administrators, to adopt best practices for online security. By imparting knowledge and awareness, you empower them to play an active role in safeguarding your site’s integrity.
Educate your users, particularly administrators who have privileged access, about the dangers of phishing attempts. Train them to identify phishing emails, deceptive websites, and social engineering tactics used by cybercriminals. Provide real-world examples and encourage a cautious approach when encountering suspicious emails or links.
Final Thoughts
Limiting login attempts isn’t just an option – it’s a recommended precaution to protect your WordPress websites. Considering the simplicity of doing so with Patchstack (or even alternative solutions for this as a starting point), it really is considered a best practice for all sites, especially ones that expect to (or already do) get a good amount of traffic.
This is a seemingly small yet important step that’s also often the first that many take to secure their WordPress websites. No website will ever be 100% secure. For starters, there are ~ 60,000 plugins available on the WordPress plugin repository – few of which actively audit their codebase for potential security issues. And this is why we built Patchstack.
Automated web application protection for site owners, developers, and agencies.
Most people in WordPress either:
- Passively worry about their site (and whether they’re taking precautions)
- Don’t worry and take little precautions (and are the most at risk)
- Spend more time than they should manually securing their sites (often enterprise companies that do code reviews all manually)
Fortunately – thanks to Patchstack, you don’t have to be with:
- Notifications for new security vulnerabilities
- Automated protection with vPatches and security hardening
- Remotely managed software and updates with automations
And much, much more.
For more on WordPress security, read our complete guide to WordPress security here.
We hope you’ve found this tutorial helpful – if you have absolutely any questions for us, feel free to reach out to our team using the chat widget accessible in the bottom right-hand corner of any page of our website. We’re here to help. 🤝